
 A few weeks ago, I shared a video by photographer, Jay Morgan, where he talked about the size of soft boxes and how different sized soft boxes yield different results. With soft boxes, size does matter! But it isn't the only criteria when selecting the best soft box for various applications. The shape of the soft box is yet another important consideration. Today, thanks to Photoflex's cool blog, I came across Part 2 of Jay's softboxology video: Soft Boxes Applied.
In Part 2, Jay demonstrates the uses of different sizes and shapes of soft boxes in a multi-light setup. Once again, Jay presents the subject in a straight-forward, succinct, and easy-to-digest way. For those of you looking to increase your understanding of soft boxes, how to use them, and how different shapes and sizes of soft boxes will help you capture better pics of your subjects, I enthusiastically recommend you watch Jay's video. And guess what? You can watch it right here, below!
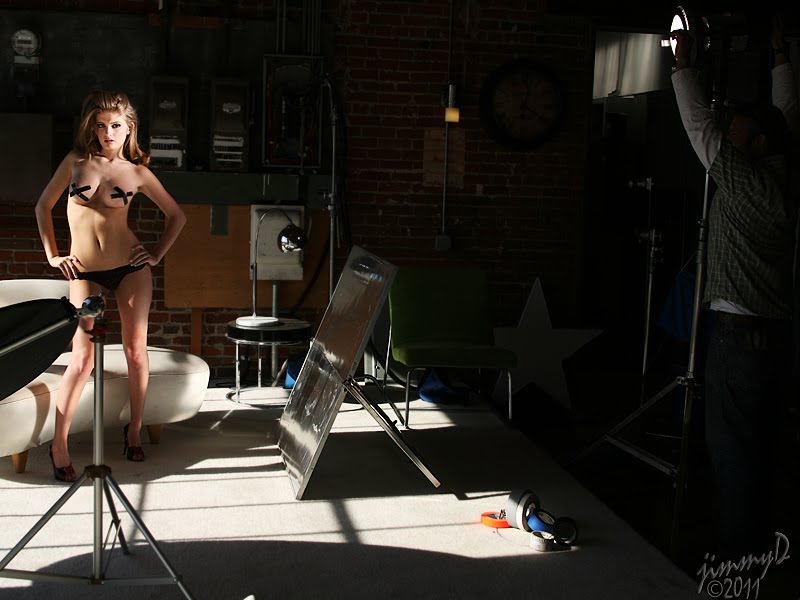
The pretty girl in my photo at the top is Faye. (Click it to enlarge it.) For the image of Faye, I didn't use a soft box at all. Sometimes, when selecting soft boxes or other modifiers, deciding to go with no modifier is the way to go. So, instead of using a soft box in front of a monolight, I employed an HMI (Hydrargyrum Medium-Arc Iodide.) I don't actually own any HMI's -- they're quite expensive and often require special maintenance -- but, since I was on a video set and the show's gaffer was a friend, I asked him if he could pull one off the truck and let me use it for my set with Faye.
As you can see, daylight coming through the window was quite bright and intense and the power of an HMI (plus the daylight color temperature it generates) was perfect for the spot where I decided to shoot my model. A Fresnel lens on the HMI provided it's unique lighting characteristics -- characteristics I'm a big fan of -- so, with the addition of a small shiny board set low and in front of the model reflecting daylight for some added fill, all I needed was the HMI to capture the kind of high-contrast pics I was looking for in my shots of Faye.
The image below is a behind-the-scenes shot captured during my set with Faye. On the right, my friend, the gaffer, is adjusting the HMI for me. You can also see the shiny board in place to the right of Faye. The reflector (on a stand) in the foreground isn't doing anything but waiting in case I might need to use it for any of my shots.
No comments:
Post a Comment